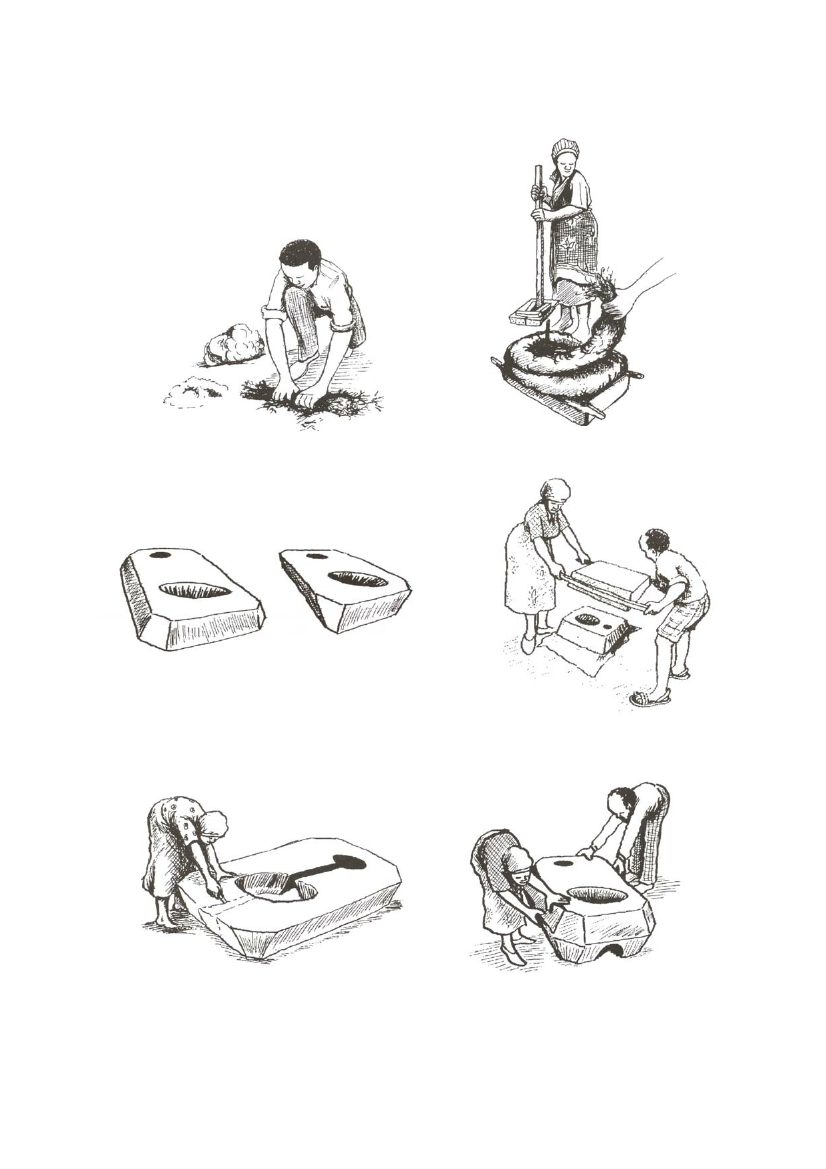
3. Roll the mud and grass tightly to form along pieces of mud rolls. The grass helps to bind the
mud into rolls.
4. Make several pieces, sufficient for making
the stove.
5. Sprinkle water and ash in the mould. This
will facilitate removal of the compacted
mud formation from the mould.
6. Pack the rolls into the mould and use a
ramming rod to compact them.
Figure 5.38 Rolling mud to form long pieces
Figure 5.39 Compacting the mud rolls in the mould
7. Turn over the mould to remove the first part
of the stove.
8. Repeat this one more to mould the second
part of the stove.
Figure 5.41 The two parts of the Unicef Stove
9. Invert the lower part of the stove, and using a
knife, cut out the stove door and the opening
leading to the chimney.
Figure 5.40 Inverting the first mould
10. With the top side facing up, fix the stove top
onto the stove bottom.
11. Prepare the chimney and fix it in position preferably next to a wall for support.
Figure 5.42 Cutting out the door
Figure 5.43 Fixing the top of the stove
12. Complete the walls using cow dung and ash.
13. Let the stove dry for two weeks before smearing and another week before use.
17